Installation
This section is dedicated for a new installation of Stay In Tarkov. If you’re looking to update SIT, click here.
Getting started
Escape From Tarkov requirements
You need a legally purchased copy of Escape From Tarkov, obtainable here.
You need to install the game using the official game launcher.
You need to run the game at least once using the official game launcher.
Warning
DON’T move your original EFT game folder following the installation.
DON’T change any of the files in your original EFT game folder.
YOU MUST run LIVE Tarkov at least once. If you don’t, you forfeit all of you’re mortal possessions to my dog.
DON’T install SIT in your original EFT game folder. YOU HAVE BEEN WARNED!
ALWAYS make sure you are able to run the game using the official game launcher before using SIT.
DON’T take shortcuts. Follow this step by step. If you haven’t, you will be MOCKED
Preparing the folder structure
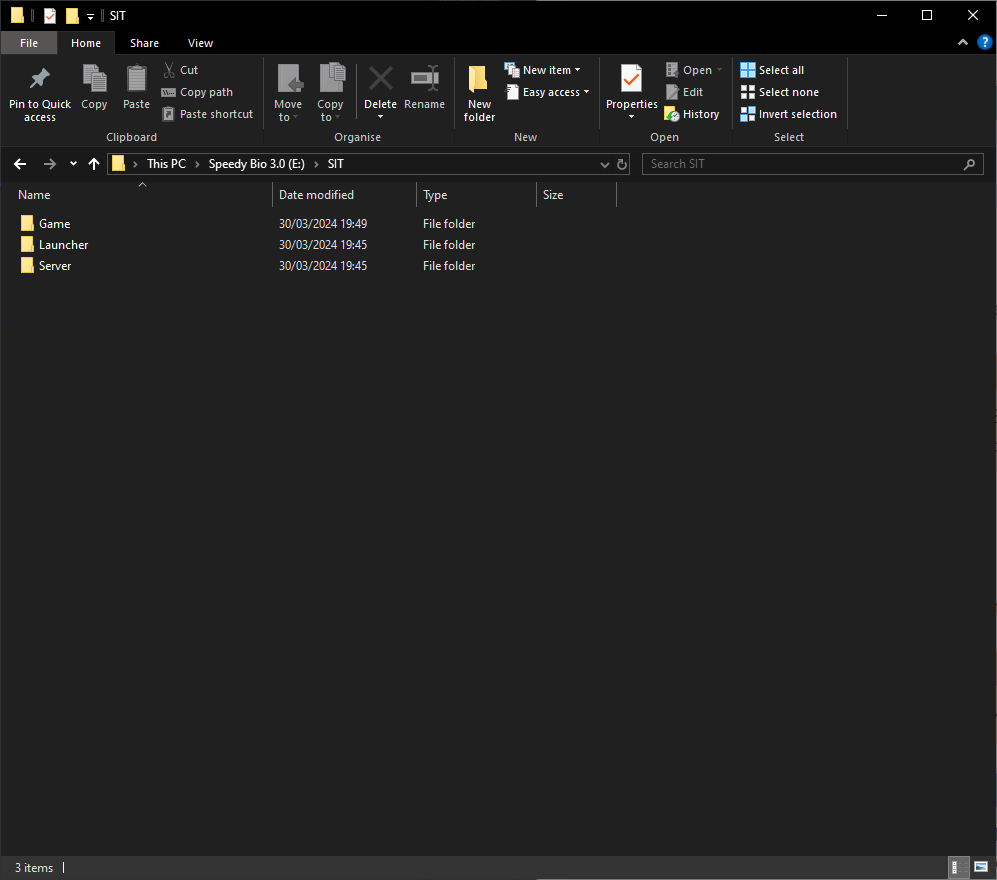
Create the following folder structure on the drive of your choice, as long as it has enough space for Escape From Tarkov. The drive should have at least 60GB free space.
Warning
DO NOT install the manager in a protected directory such as system32, Program Files, and Program Files (x86), If you do I will steal your Hard Drive platters and sell them for Freddos
SIT/
├── Game/
├── Server/
└── Launcher/
Example directory layout

Note
It is recommended to use this folder structure for a SIT installation. Note that the rest of the documentation will refer to that structure.
Below is the steps to install the SIT Manager, which as of version 2.0.8856.37884 can automagically copy your Live Escape From Tarkov folder
into a folder of your choice REMEMBER THE FILE STRUCTURE
Installing SIT.Manager
Note
It is HIGHLY recommended to use the SIT.Manager to install Stay In Tarkov as it HIGHLY simplifies the process and is almost completley automatic. It also provides us with valuble log files, they taste great, they help us solve issues you may encounter as well. Manual intall intructions are provided but should be AVOIDED wherever possible
Download the latest SIT.Manager from Github
Extract the files from the
.zipintoSIT\Launcher
Manager Installation
For sake of convinience, you can make a Shortcut to the manager on your desktop, since you need this EVERY time you join a server
Making Shortcut
Now open the manager and Navigate to “Install” page
Press “Install SIT”
Select the latest version (Should be Auto-Selected)
Press “Change” on EFT Install path, which right now is pointing to your LIVE install, and change it to
SIT\GamePress “Start Install”
Wait a bit for the Manager to copy your game files and install the SIT mod
Once this is complete, SIT has been successfully installed to your client. Head to Finishing up to finish the install process, or to Server Install if you plan on hosting a server
Installing SIT
Updating SIT.Manager
Note
The SIT.Manager handles updating for you, all you need to do is press “Update” at the top of the manager when you boot it. It will automatically check for a new version on boot and offer to update if it is out of date. A small example can be found below
Updating SIT Manager
Installing Stay In Tarkov Server
Local Install
Note
The steps outlined below are for installing the server locally on your PC. If you would like to install this as a Docker instance follow the steps outlined in Installing Server With Docker
Make sure the person installing the server, if they are installing it on their local machine, is the one with the most powerful PC and best Network otherwise performance may be Sub-optimal.
This applies to both hosting the AKI server, and Hosting the raid, more on that later in the guide.
Open the SIT.Manager
Go to “Install”
Click “Install Server + SIT Mod”
Change the path to your
SIT\ServerpathClick “Start Install”
Once that completes, Navigate to “Server”
Start the server and wait for the “Server started!” message
If you get a pop-up from “Windows Firewall” with the server asking to be allowed through, like this, then please click “Allow Access” this will allow the server through your local firewall and make our lives a bit easier, a short clip is exampled below the image
Stop the server, this allows it to generate all relevant configs
Once you have done that, head over to Finishing Up to continue
Installing SIT Server
Installing Server With Docker
Note
These steps are for if you want to run the server in a docker instance. IF YOU DON’T KNOW WHAT DOCKER IS THIS ISN’T FOR YOU
We provide a pre-made Linux Docker instance of the Stay In Tarkov server, found at this Docker Hub
Installation instructions are also found there, we may update here to add them at some point, but for now the Docker hub has all the info you’ll need
Install Video will be here soon`:tm:`
Finishing Up
Once you have completed installation, if you plan to join other players, head here, if you want to host then head here.
Installing manually
Warning
It is strongly recommended to use SIT.Manager to install Stay In Tarkov.
Even if Stay In Tarkov is manually installed, you will still need to use the SIT.Manager to connect to servers so this should only be done as a last resort.
COPY your Live Escape From Tarkov files into the
SIT\GamefolderDownload BepInEx.
Extract BepInEx to your
\SIT\Game\folder.Create a new folder at the path
\SIT\Game\BepInEx\calledplugins.Download the latest Stay In Tarkov release.
Extract the
StayInTarkov.dllfile to your\SIT\Game\BepInEx/pluginsfolder.Extract the
Assembly-CSharp.dllfile to\SIT\Game\EscapeFromTarkov_Data\Managedand replace the file when prompted.